Showing posts with label embroidery. Show all posts

Wednesday, March 21, 2018

Rolling With The Punches

it me
I am feeling a little hard-done-by presently.  The blue silk dress is mostly finished--just need to fell the armhole seams, do the skirt center front seam[1], and hem it; but when I tried it on with the sleeves attached, I realized that it really is too tight to wear (by about 5lbs worth, if you see what I mean) and I would feel both physically and psycho-emotionally uncomfortable wearing it at present.  So, that's irritating.  On the bright side, it means I am not going to make myself crazy trying to finish it and redo the surcoat for Saturday.

Which is probably for the best; because although the antibiotics finally knocked out my sinus infection, I have had an adverse reaction to them which made me break out in giant itchy hives all over my body for the last several days[2].  I'm kept functional by Hulk-appropriate doses of antihistamine, but it's not conducive to sewing, far less being creative.

pricked und pounced
I did manage to fulfill my commitment to make a favor for the youth fighting on Saturday.  I have a personal dislike of the giant rectangle belt favors much...favored...by tradition, so I figured to do the narrow kind you can tie around the warrior's arm.  Since my colors are blue-and-gold, and I have all these handy blue silk scraps from the dress, I cut a strip from the waste to embroider my badge on.  I transferred the design with the prick-and-pounce technique I learned at last year's embroidery academy (using baby powder instead of lampblack, and an estoile from the Traceable Art Project).  This worked pretty well, except the silk was so thin I couldn't put it in a hoop, and my thumb kept smudging the lines. 

finished object
I outlined the whole estoile in stem stitch with golden silk floss.  Since my badge is blue-and-gold, and I had this lovely blue ground already, there was no point in embroidering that half; I just filled the gold half of the estoile with the same silk floss.  In stem stitch as well--which is not a filling stitch, I know, but I thought it would work well enough for something this small.  [Narrator's voice: It didn't.]  (Well, it did, but it was a pain in the butt and not as nice as it could be.)   In general, I do need more practice with stem stitch--I couldn't get the outline, even, as crisp and exact as I wanted.  Add it to the list of things to work on.  -_-   I also made a fundamental error in spec'ing out the project; I cut the silk strip with the thought of just hemming the edges, but of course it actually needed to be folded over so as to protect (and make invisible) the wrong side of the embroidery.  So I had to tinker with it a good deal to make it work and get it hemmed, which also means that the estoile goes a leeeetle too far to the edge, but whatcha gonna do?.  The next one will be better.

It's coming to the time where I have to plan and, more to the point, prioritize the summer sewing (in conjunction with my other obligations).  There's going to be more learning experiences, sigh, since I am intending to make my dashing consort a proper 14th-century kit: braies, shirt, hose, tunic, cap (and hood if I have time), none of which I've done before--well, the shirt is easy, and I've made hose for myself but that was years ago--.  Plus, I need to take in the two dresses I finished for last year, because I do not enjoy my boobs wandering down somewhere around my navel.   And, of course, the mending.  Ugh.


[1] I think I need to start the eyelets further down, too.  Trying to decide if that means I have to cobble together additional facing.  I don't think so, since it's not load-bearing?  Because it would be a fucking nightmare to do at this point.
[2] and they started a day after I finished the antibiotics.  Is that fair?  I ask you.

Sunday, July 9, 2017

Secret Project REVEALED: A Laurel's Hood

we did a thing!

At last it can be told!  The item I alluded to in earlier posts, that I spent a chunk of this spring on, was presented to its recipient yesterday, so now I can tell you all about it.  

The request was for a 14th-century hood as part of Laurel regalia (in place of a cloak) for Stephan of Silverforge, which would be executed as a team effort between myself and my ronin-sister Ceinwen. We had a pretty free hand, modulo the information that he'd probably rather not something in traditional Laurel green, and that he likes wearing hoods in the wacky late-14th century "chaperon" style (this is where you put the face opening of the hood on top of your head like a hat, drape the mantle along your shoulder, and wrap the liripipe around your temples).  

Design Stage (March-early April)
BNF 1586, folio 56r
Since Stephan's arms are blue and silver/white, we figured to make the hood blue wool with a silver silk lining.  We then went all over the map with decorative design choices...fortunately, in an effort of self-preservation, backing away from the full-on goldwork and needle-painting idea before it got too entrenched in our brains...and agreed on a simple vinework pattern in a band along the lower edge of the hood as one often sees in manuscripts of the era. 
one of the Comminges laurel
wreaths


Ceinwen's initial design sketch
For the wreaths themselves, well, now you know why I was so damn excited about finding those images of the St. Bernard de Comminges cope at the embroidery schola; at last we had solid documentation for 14th-century laurel wreaths!  Woo!  So Ceinwen took those photos and sketched them into a workable design.  The plan was that I'd make the hood, send it to her, and she'd fiddle the design size/orientation to work on the final size and angles of the hood's mantel.  We also considered adding stars and/or swords (elements from Stephan's arms) directly onto the rest of the hood, either as appliquè or as metal "spangles", but that was, as they say, a stretch goal. 

The other major design element, in light of the recipient's chaperon-style tendencies, was to cut the hood's liripipe as laurel leaves, so it would form an actual laurel wreath when he wrapped it around his head.  I'd never made a liripipe before, so why start with something boring and normal? 

Fabric-wise, I had ten yards of a handsome navy twill that I was hoping to use, but twill wasn't going to be a great choice for a cut liripipe unless we lined and/or finished every. single. stupid. leaf; and bugger that for a game of soldiers (and, at that, I'm not sure it was Done).  So, I ordered Wm. Booth's navy blue broadcloth, which, although rather a darker blue than we wanted, was perfect in the weight & behavior department.  I got some silvery-blue silk from the Garment District for the lining, and Ceinwen picked up an exquisite heavy navy blue silk for the embroidered band, and off we went[2]. 


warning: math ahead
Construction Stage (late April-early May)
I based the hood on D10597 of the Greenland finds, which was pretty exact to the proportions Stephan's lady had sent me from one of his current hoods.  I spent an uncomfortable couple of hours with math and many pencil marks converting the 2mm:1cm scale in "Medieval Garments Reconstructed" into Imperial measurements, but got there eventually.   The rest seemed pretty unremarkable--I made a muslin; tested it and it seemed OK; cut out hood & lining; sewed it all up[1], and did a bit of decorative top-stitching with a pale green silk; patted self smugly on the back; and then tried it on my dashing consort.

Whereupon I found the front was horribly, horribly poochy under the neck.  


This was my own stupid fault.  I tried to cut the front part in one to the same size as the pattern, without including the front gore, and it did not work at all.  THE PATTERN EXISTS FOR A REASON, IDIOT.  And them medievals don't shove in gores because they love doing extra seam work. 

After a requisite amount of self-flagellation, I calculated the gore size appropriate to the pattern, cut one out of muslin, opened the front seam sobbing at the destruction of my painstaking handiwork, and pinned the gore in.  It worked with only a little frobbing, thankfully, so I cut out fashion fabric & lining versions and got them sewn in.  (You still see some wrinkles; there will always be a little bit of that, unless you're doing a button-up hood that can be perfectly fitted to the wearer.)


So, the liripipe.  Some of the Greenland hoods, including D10597 have them (though they're all plain).  In most cases they're separate strips that attach to the back of the head, but in D10597's case there's a couple-inch liripipe "stub" on the back of the hood's body that the main liripipe strip is attached to; and since that would make my life considerably easier in any case, I cut the hood out that way, and left the stub open while I figured out how to attack the problem.  


tools of the trade
When you really suck at
drawing, grids help.
I started by looking at what remnants we have.  There are various scrap finds in London that are dagged; it's not clear whether they were liripipes or what, but some certainly could have been (Fig. 180 in Textiles and Clothing is a line drawing of a figure in Cambridge MS 61 f.1v, who's wearing a hood with a dagged liripipe), and the scale of fragment No. 248[3] seemed about right, so I started with its basic dimensions and worked to turn the basic diagonal "slit" dagges into laurel leaves.  (We do have a remnant of what appears to be an oak-leaf dagge, so a botanical motif is not far off.)   

I tried sketching laurel leaves after the embroidery I'd found, but this was working out poorly for me, so I got an actual bay laurel leaf out of the kitchen and traced around it.  Happily, this turned out to be exactly the right proportion for my liripipe!  I made a five-leaf-long repeat of the pattern (which is exactly one sheet of graph paper, imagine that) and cut out a test piece to see how it did. 

Answer: pretty well, actually.  


Proof-of-concept
Emboldened by this success, I cut out the full length of liripipe (which worked out to about 40", as I recall).  Now, I'm not sure this is how it would have been done in period; I'm guessing a plain, thin, straight liripipe would have been all-in-one, but I haven't worked the math as to whether a more wasteful cut like this mightn't have been done in sections.  But I had the fabric, and this is not a poor man's hood, so let's be extravagant.  I cut it out and attached it tightly to the hood "stub", completing this phase of the project (though I was silly and finished the bottom hem of the hood, so we had to cut that open subsequently to attach the embroidery strip, bah).  I boxed it up and sent it along to Ceinwen.

Embroidery Stage (May-early July)
My first wreath.  About 15 hours'
work I think? I'm not very fast.
All I can say about this is, I do not look forward to my turn in the barrel for having to design an embroidery strip to hang neatly and evenly on a three-dimensional conical object, and Ceinwen did an amazing job making that happen (but I'll let her tell you about her process in her blog) (AHEM).  When the design was complete and the goldwork vines established, I went down to Ceinwen's and we did a marathon sweatshop to get the wreaths embroidered.  

Unfortunately we ran out of time, so couldn't add pearls or bezants or bells (yes. there are hoods with bells all over them.), but we got the job done on time for transport to the event.  We figure to steal it back later and fully execute our vision.  Especially the pearls.

As yet, no photos have emerged from the event, but I'll add action shots as they become available.


[1] yes, of course it's all hand-sewn
[2] this is somewhat compressed.  We had a lot of ordering of swatches and mailing them back and forth in here.
[3] acc. no. BC72 <3110/1> but it's not in the MoL's online collection nor can I find an image online because why would we want that


Sunday, April 30, 2017

I Aten't Ded


Hey kids, let's put on a picnic!

Wow, it's been awhile, hasn't it?

I haven't been idle these past four weeks; quite the opposite[1].  It is usually a hand-waving and slightly contemptible excuse to say "wah too busy to blog/time track/update my projects", but truthfully I have a certain methodology for posting, and the pattern of my recent activities has prorogued that.  

So, what've I been up to?

The first weekend, I went to an embroidery academy way out in Pennsylvania, that I had agreed to teach at.  It's a full weekend thing, with everyone crashing in the camp's bunkrooms[2], which gives a lot more scope for more in-depth and hands-on classes.  I learned Bayeux stitch, and I started a canvas-work Elizabethan floral slip (which class incidentally also had hands-on instruction in prick-and-pounce for tracing your pattern; something I'm happy to have in my toolkit).  They also had a lovely touch of everyone bringing relevant books and pooling them into a library/research space; and I encountered a new book unfamiliar to me, which may have the only artistic representation I have ever seen of a laurel wreath in the high medieval era.  That is, you see laurel trees in manuscripts, e.g. the Tacuinum Sanitatis; but, unlike grapevines, oak branches, acanthus, etc. you never (hardly ever) see laurel used as borders the way we like to use them for Laurel regalia in the SCA.  

Also includes neat animal pictures!
NB: This is not Notre-Dame in Paris, but in a town
in the foothills of the Pyrenees.
For the Pel-Laurels out there


So a great event, though exhausting, and I recommend future iterations to all my embroidery peeps.

I spent the following weekend creating our Household Great Wardrobe Account; a spreadsheet of all our clothes (not accessories yet, but I'll get to it), the current state of each...including fit...and any repairs needed.  I then used that information to build a Trello board of sewing tasks.  I can unpack this more in another post if there seems interested; but briefly, each "card" on the board represents a piece of work to be done, whether large or small, but each an individual task, whether it's a mending job or for new construction.  E.g., for the work still remaining on the pourpoint, one card is "rip out the lower sleeves" and another is "cut out new lower sleeves" and yet a third is "quilt new lower sleeves".  I've also color-tagged them by project, and where applicable, included due dates, so I can prioritize.  The idea here is that I can come home from work, and even if I'm awfully fried and have no reasoning capability left--which is regrettably common right now--, just pick one discrete task to work on.  So far, this is working tolerably well.  For instance, I don't think I would have finished the little Bayeux stitch project and gotten it onto its final destination without this; it would have been yet another half-finished blorp taking up space in my project basket.
PSA: it's a royal pain to
appliqué something onto
an already-made book
cover

There's a collaborative project I'm engaged in and have spent a deal of time on, but it is S3KR1T so you won't hear about it until later.   

Last weekend, my college BFF came to visit, and we Marched for Science and had great conversations and stuff.  She is also in the Arts Scene, but in a different kingdom and as a performance artist (you could say that she wrote the book on commedia dell'arte) (that should be a link to Compleat Anachronist #173, but someone at Milpitas has not updated the page in a year, ahem), so it was really interesting to compare notes about How Things Work for each of us.  

And, oh yes, my honorable colleague and I put on an event this weekend!  We've been trying for years--and I use that word quite literally--to drum up a small event within the boundaries of the subway system. This is a difficult thing, because space in NYC is so outrageously expensive, even for non-profits, so we thought hmm, what about in a public park, since a parks permit is only $25?  The problem here, and why it took years, is that the people in charge of permits make the Keystone Kops look like NASA.  I will not weary you with our series of disappointments--other than mentioning that last year, we had the permit in hand and everything was going swimmingly until three weeks before the event, when they suddenly called us up to say oh, oops, they double-booked the permit, so ours was revoked.  >:-/    BUT!  This year it finally worked!  The weather cooperated, we had about 26 people, and there was live music and dancing and hanging out and lots of food.  Also, we weirded the day for many of the good people of Brooklyn.

In addition to being co-event-steward, however, I was seized with the compulsion to have my contribution to the potluck be something defensibly medieval.  Thus, for the past two-three weeks, I have been mumbling over medieval pie recipes and foisting test versions on unwary passers-by.  

So, pies are A Thing in medieval cookery; indeed even hand-pies (in the general vein of the Cornish pasty) were known to exist; but the pies we have recipes for are, chiefly, items for lordly tables, and super-fussy and in many cases not very convenient to eat, particularly at a picnic.  I also wanted to have a broad spectrum of choices for different dietary restrictions.  So, I made one of the classic stalwarts, the Tart in Ymbre Day from Forme of Cury (this is from the court of Richard II, about 1390):

Tart in ymbre day. Take and perboile oynouns & erbis & presse out þe water & hewe hem smale. Take grene chese [brede AB] & bray it in a morter, and temper it vp with ayren. Do þerto butter, saffroun & salt, & raisons corauns, & a litel sugur with powdour douce, & bake it in a trap, & serue it forth.

A lot of people interpret "erbis" as "herbs", which I think isn't right; there's no reason to parboil herbs. "erbe" in French refers to grasses and leafy ground plants, so I think it's much more likely to refer to Dark Leafy Green Veg, which you might indeed want to parboil.   So I parboiled yellow onions & kale, squeezed the water out as best I could, and blitzed them in the food processor because I was on the clock; added queso fresco & butter, and rubbed them in with my hands as you do with fat in a pie crust; and stirred in eggs, currants, and the spices as noted.  

Now, on my test run, I turned them into little empanada-sized hand pies and it worked well; but on the production run, it was too liquid and this wasn't working at all, so I just tipped it into a regular pie crust and called it a day.  

A meat pie was trickier; a lot of the recipes are less filling-ish as we know them, and I didn't see them working in this context.  So I decided to go off the reservation a little, and work from rissole recipes instead.  Rissoles are little filled dough/pastry pockets--think of them in the pierogi or ravioli line--which were deep-fried; but there is one reference to baking them instead, so that was good enough for me.  

I started with Scully's redaction of Chiquart's meat rissoles:

Again, rissoles: and to give understanding to him who will make them, according to the quantity of them which he will make let him take a quantity of fresh pork and cut up into fair and clean pieces and put to cook, and salt therein; and when his meat is cooked let him draw it out onto fair and clean tables and remove the skin and all the bones, and then chop it very small. And arrange that you have figs, prunes, dates, pine nuts, and candied raisins; remove the stems from the raisins, and the shells from the pine nuts, and all other things which are not clean; and then wash all this very well one or two or three times in good white wine and then put them to drain on fair and clean boards; and then cut the figs and prunes and dates all into small dice and mix them with your filling. And then arrange that you have the best cheese which can be made, and then take a great quantity of parsley which should have the leaves taken off the stems, and wash it very well and chop it very well in with your cheese; and then mix this very well with your filling, and eggs also; and take your spices: white ginger, grains of paradise--and not too much, saffron, and a great deal of sugar according to the quantity which you are making. And then deliver your filling to your pastry-cook, and let him be prepared to make his fair leaves of pastry to make gold-colored crusts(?); and when they are made, let him bring them to you and you should have fair white pork lard to fry them; and when they are fried, you should have gold leaf: for each gold-colored crust(?) which there is, have one little leaf of gold to put on top. And when this comes to the sideboard arrange them on fair serving dishes and then throw sugar on top.  [tr. Elizabeth Cook]

...which redaction started with ground pork, for convenience, and I really think that's the wrong way to go about it; but I made it up and it worked well enough, but it was reeeeeeeally sweet.  This is no doubt because Chiquart, as the master chef of the Duke of Savoy, was making expensive and very very fancy food, and sugar is a great expression of wealth; but it was not at all picnic food.  So I took it down several levels of society, and went with our friend the Menagier de Paris:

RISSOLES ON A MEAT DAY are seasonable from St. Remy's Day (October 1). Take a pork thigh, and remove all the fat so that none is left, then put the lean meat in a pot with plenty of salt: and when it is almost cooked, take it out and have hard-cooked eggs, and chop the whites and yolks, and elsewhere chop up your meat very small, then mix eggs and meat together, and sprinkle powdered spices on it, then put in pastry and fry in its own grease. And note that this is a proper stuffing for pig; and any time the cooks shop at the butcher's for pig-stuffing : but always, when stuffing pigs, it is good to add old good cheese.  [tr. Janet Hinson]

It occurred to me to use beef instead of pork for a public contribution, because more people have pork restrictions than not; so I went to get a braising cut of beef to cook in the same way, but had an idiot braino and got an eye of round instead, which is All Wrong.  So I ended up having to use ground beef instead, grumble.  But it's simple; I browned the beef, mixed in chopped hard-boiled eggs, spiced it, and filled my wee pies.  The first round was really too bland, so I lashed in the long pepper with a will, and I think the production round went well.  

I had meant to make the Menagier's fruit versions as well--

Item, on ordinary days, they can be made of figs, grapes, chopped apples and shelled nuts to mimic pignon nuts, and powdered spices: and the dough should be very well saffroned, then fry them in oil. If you need a liaison, starch binds and so does rice.  [tr. Janet Hinson]

...and I did make a test run of those, which were quite nice--very like mince pie, actually; but for the production run I was entirely out of spoons and could no more that night.  Well, there was plenty of food, anyways. 

A word on crust: we don't have much in the way of actual medieval pie crust recipes, because as you see in Chiquart's version, the pastry cook was a completely different person (and different guild maybe?) and if any of them recorded their work, it hasn't survived.  It's likely that many crusts were just flour and water (no fat), as we see later and all the way into the 19th century, and were acting as tough containers rather than foodstuffs themselves. But we do have some recipes for tarts anyways which include butter, eggs, sugar, and other ingredients.  In this case, I just made my standard pie crust recipe.   If you want to know more, someone's broken out a whole bunch of references according to type.

So. Yes.  Some things happened.  And now, the summer sewing season.  *flail*


[1] well, I admit I spent three days just playing Assassin's Creed:Brotherhood right after the pourpoint test launch.

[2] AHAHAHAHAHA I GOT THE TOP BUNK THIS TIME

Thursday, October 6, 2016

London Arts Pilgrimage: There Were Some Embroideries

YAAAAASSSSS
As I mentioned previously, there's this little exhibit on at the V&A, and we put on our scallop shells and filled our scrips with travel rations and fared forth to see it.  If at all you can go, you should; and if you can't, you should still order the exhibition catalogue, which is entirely the bomb.  (Let me note, however, that the current sorry state of the pound sterling means that the catalogue is $45 if you buy it at the museum bookstore, and $75 if you get it from Amazon.  So if you go in person, you are SAVING MONEY.  Who loves you and is watching out for your well-being?  That's right.)

Anyways.


So yes, as anticipated, photography was strictly verboten.  The exhibition catalogue is almost good enough that it's OK, but I snuck the above photo of the Black Prince's jupon anyways, because it is THE BLACK PRINCE'S JUPON and I was never going to be that close to it again.  Regrettably, even with my nose pressed against the glass like a Dickensian street urchin outside a pudding shop, the net they've put over the garment to preserve it keeps you from seeing any additional construction detail...and it's so worn away there's not a lot left to see...but it was still a Religious Moment for me.  Fun fact: they clearly spent all this time and expense doing metal-work appliqué onto velvet...and then just ran the quilting channels right the hell over it.  Well OK then.


Wool intarsia seal bag with
embroidered border, c. 1280.
Westminster Abbey, WAM 1494
There are about 80 objects in the exhibition altogether, and a lot of them are the Greatest Hits of Religious Garments you'd expect, like the Syon Cope (which the light in its case wasn't working the day we went, heck of a job there, Brownie) and the Butler-Bowdon cope; but they did a great job rounding up what few surviving secular and semi-secular articles were out there.  So not only did I get to drool on the jupon, I also got to get real up-close and personal with the Cluny's horse trappings (and not just the usual big piece with the leopards of England on them, but some smaller scraps that still have their pearled bits intact!) and a royal seal bag that's of particular interest because it's wool appliqué with no metal-work, which is something we know existed but very little has survived (the Tristan Hanging is one, though it's onlaid rather than inlaid like this little guy) and a fascinating little heraldic number, now in the form of a burse (a case for carrying a cloth used in the Mass), showing a shield with the arms of Stafford impaled with the Woodstock differenced version of the royal arms (so it had something to do with the marriage of Edmund, Earl of Stafford, with Anne Plantagenet in 1398)--but what it was cut down from is entirely unclear.  The exhibition people think it's from a banner, but my reading this summer suggests that you never saw arms on a shield shape used on banners, so my money's on some kind of domestic textile.

Other Moments:
  • Beth's contention that half our problems recreating these works are because we can't get the fineness/tightness of linen that the originals were created on
    • likewise, silk twill, Y U NO
  • Unexpected couched-and-laidwork on the Clare Chasuble
  • Crawling on the floor in front of the Syon Cope to look at the stitchery around the hem in the reflected light from the video playing across the room
  • Being blinded by the 100% intact cloth-of-gold of the Fishmongers' Pall
  • PEARLS ON THINGS
  • Seeing the strong repetition of motifs; not just "it's a cope and it's gotta have the Annunciation on it and that means a lily in a pot", but the almost carbon-copy design details across the board
  • The interlace patterns on the Hólar Vestments, which really need to be turned into trim
And then there was everything else we looked at. Even after cherry-picking all their special stuff for the exhibition, the V&A has a ridiculous amount of textiles; and we spent some quality time in the Museum of London and the National Gallery too.  (And Buckingham Palace, but that was about QE2's Wardrobe Unlock'd, not QE1.)  I haven't started processing the photos with any seriousness yet, but here are a couple of teasers:
TIL tablet-woven edges are still
around in Elizabethan sweet-bags

Elizabethan blackwork handkerchief.
They must've had some serious
colds, is all I can say.


Silk fragment, Byzantine, 900-1100.
Shows noticeable design similarities
to Chinese-produced textiles


Saturday, August 20, 2016

Post-Pennsic Roundup; or, A Holiday in Cambodia

Disclaimer: we did not have elephants
This year's Pennsic was not as vacation-ish as most are for me.  We were blessed (?) with unusually high heat & humidity, to the tune of heat indices over 105 many days, alternating with monsoon downpours.  I'm not at my best (to put it mildly) in hot, sticky weather, and even less so when one has to be continually on the bounce to prevent the camp from floating away on a muddy river of fail.  And, most years there'll be a couple days like that here or there, which is OK and one can cope, but a steady progression of them is taxing.

Another issue--as noted previously, I had cut out a linen kirtle before leaving and I was bound and determined to get it finished in time to wear it for my Elizabethan Working Clothes class.  Now, if I'd been at home with no job to go to, this probably could have happened; but onsite, while managing a camp of 70 people, in a climate that completely nerfed my concentration...yeah. No.  So for the whole first week I was additionally stressed about a) not working on my dress in that moment, b) how slow I was going when I was working on my dress, or both.  Finally during the middle weekend, I let it go and admitted I wasn't going to get it finished, and I was able to actually start having some fun.  So, lesson learned: I will not take any project to war that I "need" to finish on a deadline.  It's vacation, dammit.


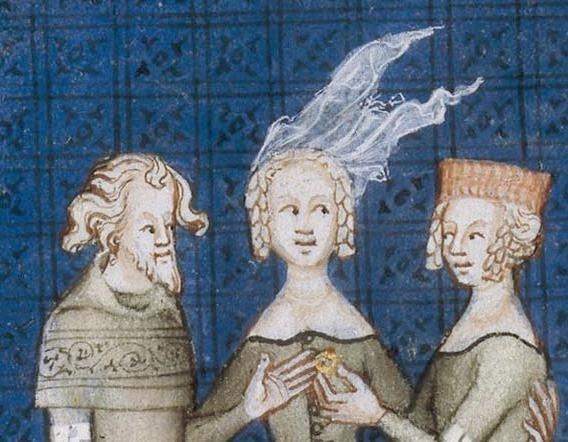
My A&S display, complete with very decorative
Baroness Chief of Staff. 
Thus, the down-sides.  On more positive notes, I taught two classes and I think both went well (even though about five times as many people showed up than I was prepared for); I showed The Big Damn Banner and the Flat Cap of Success at the A&S display, and I think I came off tolerably well; I fit the muslin pourpoint pattern to my client; and I paneled the Big Damn Banner at the Athena's Thimble meeting, where my guildmates honored me with a ranking of period competency in appliqué.  Another lesson learned: few people will do more than glance at a flat cap on its own, but if you display it on top of a skull, at least you'll get a second look and a giggle.

So that all happened; now I need to prioritize projects for the next couple of months.  I think it comes out something like this:

  1. Make up the linen version of the pourpoint commission; which breaks down
    1. make up just the lining, and do another fitting.  Adjust as necessary.
    2. Take a pattern of that version.
    3. Finish it, padding and all, and see how it fits; record all details for when we do the Real One.
  2. Finish the @*$! kirtle.
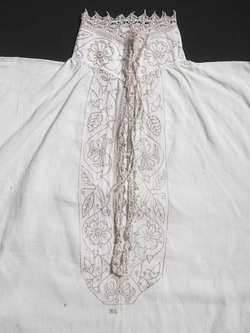
  3. Make up the partlet I cut out at the last minute and didn't do anything with.
  4. Complete all the lacing holes, and make lacing cords for, my consort's black linen suit.
I'm putting a tentative target date on these tasks of end of September; I think that's not too ambitious, particularly since only the pourpoint should be thinky work.  Though, if it continues being horribly hot, I may have to swap in making braies, hose, and a coif for Himself, so he can wear his Bocksten tunics to events in September with greater comfort.  I'm not trying to plan ahead any further than that at the moment, for the sake of my sanity. Though I'm really kinda hot-and-bothered to make a couple of drawn-thread napkins for our feast gear.

Oh. And. I, um, may have also committed to help create a small schola in Manhattan for sometime next spring.  Which mostly involves calling a lot of places to beg for space that won't cost the earth.  We'll see what happens.


Sunday, April 24, 2016

More Odds & Ends

there's that job jobbed
The first thing I did with the aforementioned free will was to finish, believe it or not, another daisy.  There's a comedic backstory to this (which, to anyone who knows our atelier, is 100% par for the course), but long story short, the Actual Laurel Cloak™ hasn't been done yet (the candidate was robed with a substitute cape-let [that we stayed up all night making {and was still pretty stylin', I must say}]).  It will still happen, and it will still have lots of people's embroidered daisies on it, and mine had been hanging about since August, so I finally got off my arse and finished it.  ONE. MORE. CHECKBOX!

I'd done about 1/3 of the petals in the previous push (see previous post for context re: what I was trying to accomplish), which took me maybe 6 hours in total..whereas it took me somewhat less than that to do the entire rest of the motif, so I think we may safely say that Learning Has Occurred.  There's clearly a lot of room for improvement, technique-wise; when I look at the stitches closely, I am bothered by their unevenness, and I'd like the shading to be more graceful; but I feel it's not bad for a first attempt.  I certainly do understand now why they recommend you actually color in the design with colored pencils before stitching, though.

Once the petals were done, I just did the stem in stem stitch (duh), and the center as well.  Mostly because I was kind of on a roll with it, but also I wanted to experiment with using it as a filling stitch.  I'm not sure about the two colors of yellow--I had a vague thought it would give a kind of textured effect, which I don't think it did exactly, but it's a little more visually interesting than plain yellow all the way in?  Maybe?  Or maybe the spiraling pattern of the stitch would've been enough.  It's not bad, I just don't know if it would have been better.

I'm in a wait state on the possible commission, so I backgrounded that process and spent some cycles on what classes to teach at Pennsic.  I figured to do the hands-on tablet weaving class (mem: buy C-clamps), but I wasn't sure what else; I've taught the class on  linings (or not) in Gothic fitted dresses for the past three years running and maybe I should give it a break, and the pouch class is all well and good but it doesn't have a lot of practical application for most people.  It occurred to me that it might be useful to put something together on working-class Elizabethan clothes for Pennsic (I have a possible title: "No, I'm Not Putting The Tent Up In A Farthingale"), since that's a topic I'm currently struggling with.  It means I have to spend the next couple months making working-class Elizabethan clothes, for myself as well as my dashing consort.  I questioned whether this would be useful in a world where we have resources like The Modern Maker and The Tudor Tailor and Stuart Peachey's series and Drea Leed's site, but the feedback from my Facebook Greek Chorus was overwhelmingly positive.  I do feel a little bit hinky teaching other people's stuff (even with complete transparency and citation), but it was pointed out to me that a lot of fellow-travelers a) don't know or have access to these sources, and b) don't have time or capacity to trawl through it all to get actionable information, so a well-done distillation (especially including the results of field testing) would be valuable to that population.  So, all righty then.

Wednesday, April 13, 2016

Quick and Virtuous: Queen's Favors

Straightforward.  We like that.
It is the custom in the SCA (particularly in the East Kingdom, but I think it's pretty universal?) for a queen to have a tangible object with a particular design or badge specific to her that she can give to people who she wants to recognize outside the formalized awards framework.  Her Champions will have them, of course, but they can be given out for any other reason she sees fit.  These usually take the form of a "belt favor"*--a rectangle of fabric that folds over (or has a loop to be threaded upon) one's belt--and her chosen design will be on the front of it; most often in embroidery.  And since each reigning queen will need a lot of them, and since they're often embroidery, we usually end up pitching in as time permits.

I wanted some work that could be purely execution (as opposed to thinky-planny) as I came down off the banner project and some other stresses, and conveniently about that time the favor specs for Her Incoming Majesty got posted, so I reckoned as how that might fit the bill, as well as being a Generally Neighborly Thing To Do.  And, even more conveniently, I realized I had some leftover golden-yellow linen that was really too small to do anything else with, so I ran off as many "blanks" as I could fit out of the fabric (16, as it happened), and spent an evening tracing the pattern onto them all.  Not that I figure to do that many of them, gaah!  But I can take them to a local group meeting and give them out to others as a pre-made package, which--having been on the recipient end of similar efforts--I can vouch for as a good way to increase production.  

The specs, as you see above, are pretty blissfully simple: outline the design in black on a gold background.  One has the option of filling in the keys in a golden-yellow color as well, but a) I didn't think I could find a color that wouldn't look weird in contrast to the background, and b) since the specs don't call for any kind of backing or lining I wanted to make the reverse side as un-messy as possible.  So, I stuck to outlining.

For stitch choice, I had a moment of thinking double-running stitch, because it looks the same on both sides, also an advantage when you don't have a lining; but I haven't done it before and it's a counted stitch, and I wasn't sure this design would work terribly well as a counted pattern.  The smart people can probably convert it, but that sort of gets away from the Not Thinky Planny objective, so I chose stem stitch instead.

Result:

Even though the silk thread I was using was incredibly catchy and annoying, this went amazingly fast.  I finished almost the entire design in one watching of The Mummy (now on Netflix!) (and part of that was just getting accustomed to the stitch).  Obviously I could use some more practice; the first Roman numeral isn't quite as crisp as I'd like, and there's clearly a knack to using stem as a filling stitch; but on the whole it was almost like a vacation.  I'll be OK with doing a couple more if I can't farm out all the blanks I've set up.  

This has also relaxed my brain enough that I can start clearing some other items in the Pending queue, several of which are owed to other people.  First priority is re-lining the Banner Of Doom and getting it back to its owner; then I have some curtains I promised to hem for someone, um, months ago; and I can buckle down for the Summer Sewing Season.


* For the clarification of non-medieval readers: this custom is 100% ahistorical.  There are some literary references to ladies giving sleeves, veils, or rings to their favored knights, but few references in the historical record, and no references at all to tokens of this ilk.

Sunday, March 27, 2016

Banner Project I Redux: It Ain't Over Til It's Over

You may recall, about six months ago, I completed a rather large banner undertaking; or, I thought I had, anyways.  There were details I wished I had done, or done better, but for better or worse the thing was launched and in the possession of its owner, and I figured that was that. 


Now, in the interim, news came over the wires that there would be an heraldic display competition at Mudthaw (as I mentioned in passing a few posts ago).  At the time I was full of large ideas about now making a banner for myself, and I started digging into that thought, though getting mired in the dilemma over whether to do a painted one or a fabric one; and then suddenly, brain said HEY IDIOT YOU JUST SPENT A ZILLION HOURS ON A HERALDIC BANNER WHY NOT SHOW THAT RIGHT NOW AND NOT KILL YOURSELF MAKING ANOTHER ONE IN FIVE WEEKS WHEN YOU ARE ALREADY FRIED.

This seemed like a reasonable suggestion from my ordinarily unreasonable brain; so I wrote the owner, and she kindly & enthusiastically shipped the banner to me.  I figured I'd just tidy up any messy bits and close up the bottom seam, and Bjorn Stronginthearm's your uncle.

ha ha ha no

You see, the daisies bugged me.  They bugged me a lot.  Not only because they were kinda pooched, on account of only having had time to tack them down instead of properly appliquèing them; but I'd really intended to outline the petals in silver cord, so that each petal actually looked like, y'know, a separate petal.  This would not only look better, but also be much more appropriate.  (And also because it would make the banner shinier.  SHINY! shiny.)   And now I had the opportunity.  PERFECT!~  THERE IS NOTHING WRONG WITH THIS PLAN

Well, except, consider: there are eighteen daisies on this banner.  Each daisy has somewhere between 24 and 32 petals.  (Most are closer to 32.)  That's, let us say, 580 petals to outline (and they're pretty tight curves, being narrow petals, so not a fast couching job at all).  


But I was determined, and I plunged in.  I must say, it's looking really good, and makes a big difference.  (There would be an example photo here, except that apparently I deleted the one I took with my phone a couple weeks ago?)   It is, however, going as slowly as I feared; I usually don't even finish a single daisy in an evening, unless I stay up way later than I ought to.   And the time pressure is further increased by the fact that I had a pre-scheduled long weekend away, and this is by no means a traveling project.  So that removed four days of possible work, including two weekend days (though it isn't entirely lost time, as I'm presently sitting in the airport writing my documentation as well as this blog post).

I was getting increasingly worried about my ability to finish it all before the event, so I started doing every other daisy, so that if I do run out of time it'll at least look kinda deliberate.  (I mean, I'd specify in the documentation anyways that it's a work in progress; but there is a subconscious effect on the viewer if it looks regular and intentional, regardless of what the intellect knows.)  

Of course, I'll have to make time to re-attach the lining now, since of course I had to cut open the side seams to do this work.  And I may have to jettison (or at least postpone) my original plan of getting some fringe-y trim to put along the outside edges, which you see a lot in extant banners.  But the end result will, I think, be worth it.

Also it's giving me a chance to binge-re-watch Babylon 5.  Particularly Season 3.  Because Marcus.  <3


Someone please make a "hey girl" meme out of Marcus.
please.


Thursday, March 3, 2016

Project Inflation: The Blackwork Shirt

The original vision (well, a simpler version thereof).
V&A, acc. no. T.112-1972
I had an idea for a small, contained, comparatively-quick-gratification project.  I wanted to learn blackwork*, for the betterment of my dashing consort's wardrobe; he is (as I may have mentioned previously) wearing Elizabethan, and they were all into the monochrome embroideries; so it seemed good to me to do a simple set of embroidered cuffs and collar to apply to his best shirt.  (Eventually I'd like to work my way up to making him one of the super-fancy nightcaps**...but that will be a long time coming, thankyouverymuch.)  

Although I haven't dipped my toe into anything like this before, I do know that there are a number of sources for needlework patterns that were used in the late sixteenth/early seventeenth century--there are even some collections that were printed in that time, and reproduced today, conveniently enough.  So, I wasn't really concerned about that; I was more worried about how to scale a counted pattern to be sure it would fit on, say, a sleeve cuff of X inches.  And then I started frelling about which specific patterns would be used on an Englishman's clothes of the time.  And then I started frelling in circles; so, as any mature adult would do in these circumstances, I whined about it on Facebook.  Happily for me, the doyenne of blackwork took note of and pity upon my haplessness, and talked me through some of my thoughts (and also unconsciously triggered by association my memory that oh, yes, actually, I do own Patterns of Fashion 4 now).  The takeaway of most immediate significance, however, was the fact that this simple collar-and-cuffs, counted work / geometric, monochrome embroidery was not actually the fashion any more by Elizabethan times, based on the extant shirts. 

Capt. Thomas Lee, 1594;
an extreme example.
(Tate Britain acc no. T03028)
The embroidered shirts remaining (there are also a very few plain ones with only lace decoration) have embroidery on cuffs and collar, yes; but also in vertical stripes down the front and back of the torso, down the length of the sleeves, and often around the sides and hem as well. And, rather than being counted work, they are most often free-embroidery of curled vine motifs with other, naturalistic (flowers, birds, insects, etc) motifs in the loops and swirls formed.  Indeed, some of them just have flowers or plants sprinkled all over.


A much simpler smock (albeit a woman's,
but there's not a huge stylistic difference
between the genders).  Museum of London,
acc. no. A21968, 1600-1620
As a side note, it's interesting to me that so much effort was spent in places where it wouldn't be seen.  Captain Lee over here notwithstanding, most of the period portraiture has everyone completely covered in layers of expensive doublets &c; the only thing you can see in most of them is the cuffs (even the collars are usually superseded by ruffs).  The Museum of London flags their shirt of this ilk as a nightshirt**, specifically; and maybe the rest of them were, too; but this sails a frail boat of theory rather far out into the murky seas of supposition.

The good news is, free embroidery should be a lot easier to fit to the spaces I want to embroider.  Cut out the shirt pieces, lay them out, design the vine to be vinous in the space allotted, and Bjorn Stronginthearm's your uncle.   And moreover, it will be perfectly in keeping with the aesthetic of the age to be as whimsical as I like in choosing the animals or vegetables to go inside the vines. 

All of that being said, I don't intend to leap into action immediately; the priorities previously stated are still in place (i.e., "let's make sure his pants don't fall down").  Ideally, I'd still like a smaller scale project to cut my teeth on, but the Elizabethans didn't appear to be into embroidering hankies or anything like that (lace trimmed hankies, yes; embroidered, no).  There is an extant sampler from 1598, but honestly, I'm not so over-burdened with free time that I hadn't rather do something that could serve a practical purpose.  (Napkins?  I don't see any evidence that those were decorated in this fashion, but on the other hand, fiat experimentum in corpore vili.)

* "Blackwork" isn't always black.  A lot of it was, which is I guess why it got labeled that in the modern idiom; but the Elizabethans were perfectly happy to do the same work in blue, or red, or pink.
** Nightcaps and nightshirts were not necessarily worn to sleep in, the way clothing with that label is today.  They were garments you wore informally at home (often at the end of the day); I think it's not wrong to relate them to the dressing gown of "jazz-colored peacocks" that Lord Peter Wimsey receives morning or late-evening unexpected guests in.